Mega Menu
The Mega Menu is a navigation menu that allows you to display a lot of information in a clear way. It is based on Bricks Templates, which you can use to create your menu.
Important: Please note that as of Bricks Version 1.8, the Mega Menu has a native integration and it is no longer necessary to use the Bricksforge version. However, the Bricksforge Mega Menu will remain in the code base and continue to work for users who prefer it.
How to use
Create a Template
First, you need to create a Template. You can do this by going to the Templates section of the Bricks Builder and clicking on the Add New button. As Template Type, you can choose Section.
Now, you can design your menu. You can use any Bricks element you want. Also Dynamic Data and javascript depending elements like tabs or accordions are possible to include.
Disable Header & Footer
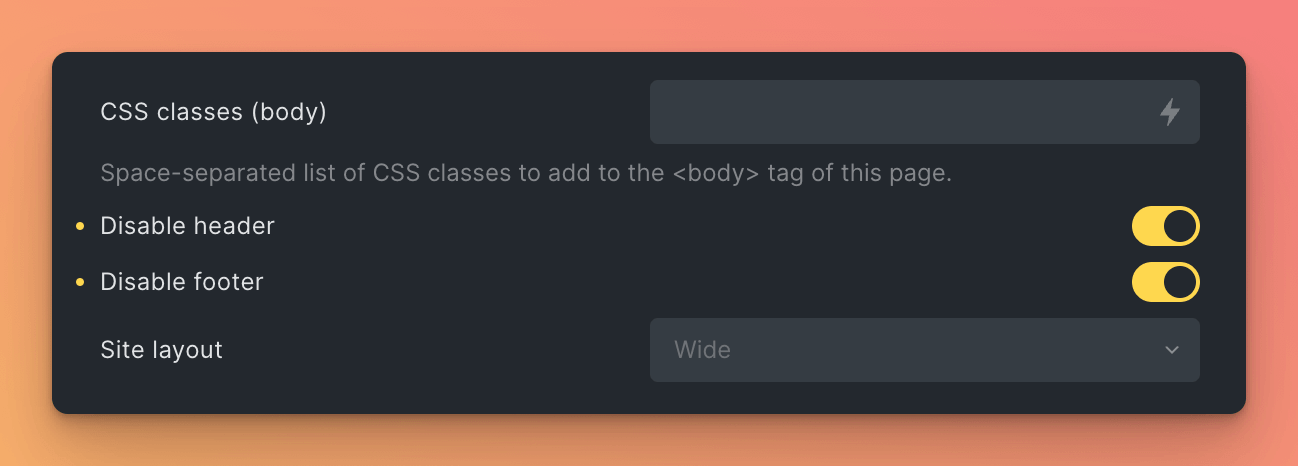
Then, you can disable the Header and Footer of the Template. This is necessary, because by default, the template will display the header and footer of the page. You can do this by clicking Settings (Icon) > Page Settings > General > Disable Header / Disable Footer.

Now you have the basic template for your menu. We can connect it now.
Connect the Template
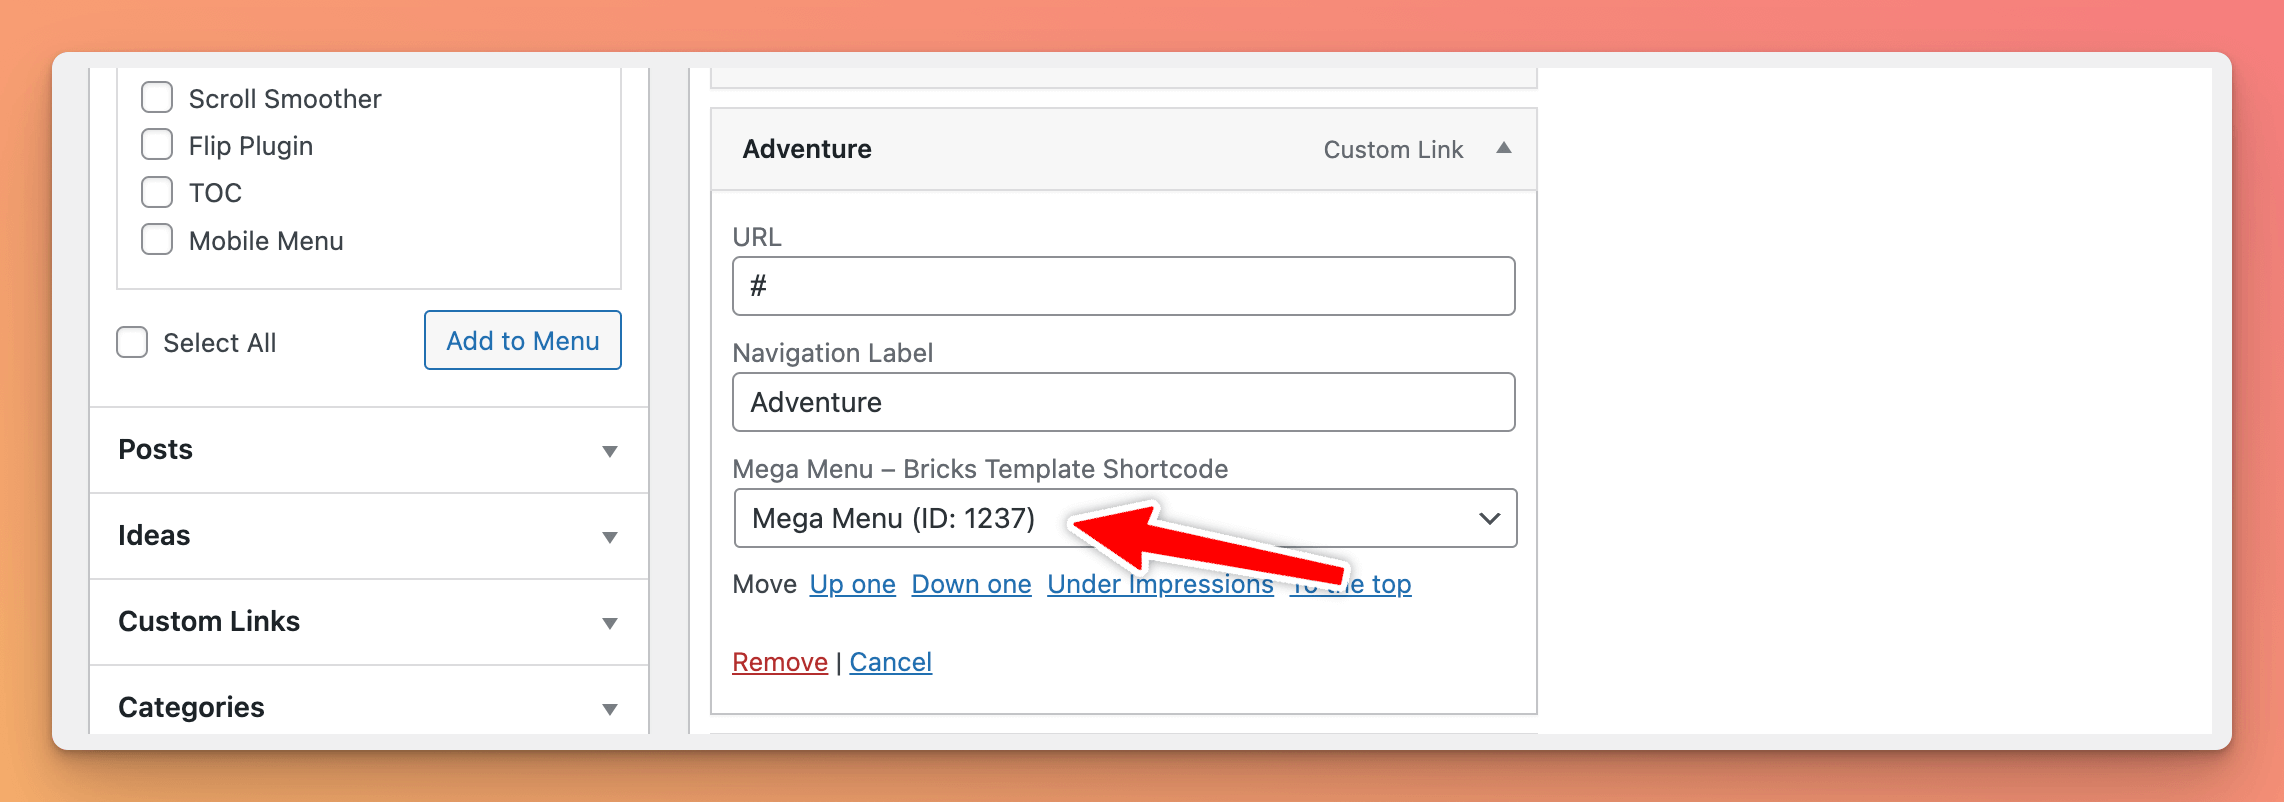
To connect the Template to the menu, you need to go to the Appearance > Menus section of your WordPress dashboard. If you don’t have a menu yet, you can create one by clicking on the Create a new menu button.
Now, you can assign a Mega Menu to a menu item. To do this, open the menu item and select the Template you created in the Mega Menu – Bricks Template Shortcode section.

Setup Nav Menu
Open your Header template. If you don’t have one, you can create one by going to the Templates section of the Bricks Builder and clicking on the Add New button. As Template Type, you can choose Header.
Now, you can add a Nav Menu element to your header.
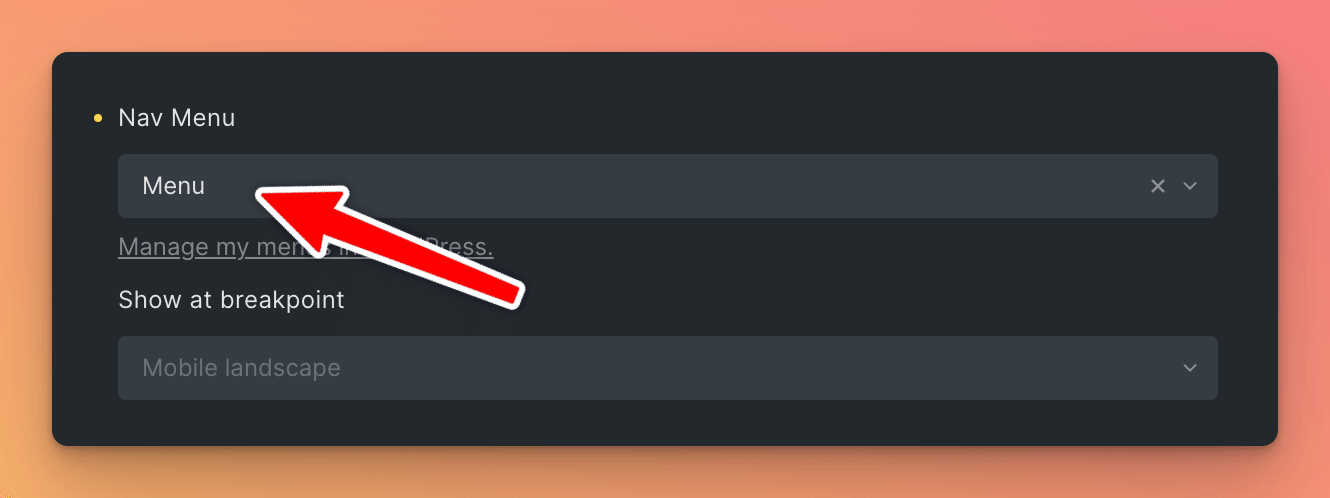
Select the Menu
One important step is to select the menu you want to display. You can do this by choosing the menu in the Nav Menu control.

Mega Menu Settings
Activating the Mega Menu extension, you can see a new control group Mega Menu in the Nav Menu element. Here you can set the following options:
- Activate Mega Menu: Activate the Mega Menu for this menu.
- Trigger: Choose the trigger for the Mega Menu. You can choose between
ClickandHover. - Full Width: If you want to display the Mega Menu in full width, you can activate this option.
- Top Spacing in Pixel: You can set the top spacing of the Mega Menu in pixel. (Without units. Example:
25) - Close Event: Choose the event that closes the Mega Menu. You can choose between
Close On ClickandClose On Hover. - Closing Selector: Assign an additional selector that forces the Mega Menu to close. (Example:
.my-selectorormain). - Close when leaving the nav item or the mega menu: If you want to close the Mega Menu when the user leaves the nav item or the Mega Menu, you can activate this option.
- Animation Duration in Milliseconds: You can set the animation duration in milliseconds. (Without units. Example:
300). Default:150
Customizing
CSS Class
When the Bricksforge Mega Menu is opened, the corresponding parent LI element will receive the megamenu-visible class. You can leverage this class to apply custom styles to the parent LI element or children when the Mega Menu is open.
When the Mega Menu is closed, the megamenu-visible class is removed from the parent LI element. This allows you to easily distinguish between the open and closed states of the Mega Menu and adjust your styling accordingly.